Showing posts with label Patterns. Show all posts
Showing posts with label Patterns. Show all posts
Kitty Cat quilted placemat
My favourite cat is the orange tabby. I had an orange tabby when I was young. Her name was Abby; Abby the tabby! I loved her, and it broke my heart when she didn't come home one day. Later in life, I developed an allergy to cats, but I still love them to pieces. I designed this cute Kitty Kat placemat pattern for a child, but a real cat lover could also use it in the kitchen as a hot pad.
A Taste of Honey Placemat Pattern: Honouring our precious pollinators
I love the quilting on the back. It reminds me of sacred geometry.
OUR HONEY BEES ARE IN DANGER!
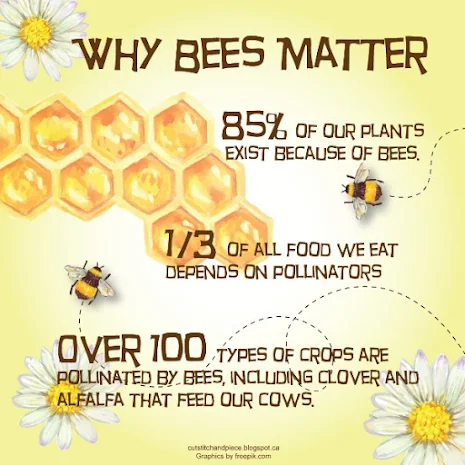
After being here for thousands of years, their population is declining and one species of bee is on the endangered list. It’s scary to imagine what would happen if all our honey bees were gone. Most of our non-grain foods are dependent on honey bee pollination. There are 90 different food plants that depend almost exclusively on the honey bee. When my husband and I heard several years ago that the bee population was declining, we planted more flowers and plants that would attract and feed them. Also, we use only non-toxic, natural pesticides.
 |
| Photo by Monica curry |
Here are five things you can do in your garden to help the bees:
- Plant bee-friendly flowers and flowering plants in your garden and yard.
- Honey bees love weeds, i.e. clover, dandelions, so leave a few in your yard.
- Don't use chemicals and pesticides to treat your lawn or garden.
- Buy local, raw honey.
- Bees are thirsty; leave a tray of stones and water to give them a place to drink.
Here are three good websites with information about honey bees and honey bee populations:
http://www.panna.org/our-campaigns/save-our-beeshttps://www.scientificamerican.com/article/u-s-lists-a-bumble-bee-species-as-endangered-for-first-time/
http://foecanada.org/en/
Wooden Scissors Pattern Now Available!
About a year ago I posted my wooden scissors project that my husband and I worked on (see post HERE). This was such a popular post, I decided to make the pattern available for sale in my Etsy Store.
These would be a great gift for the sewist or quilter in your life. They would be a wonderful addition to any sewing studio. I think it would also be a great project for a woodworking student learning the basics of using a scroll saw.
These would be a great gift for the sewist or quilter in your life. They would be a wonderful addition to any sewing studio. I think it would also be a great project for a woodworking student learning the basics of using a scroll saw.
Blue Diamond Quilt Block
Who doesn't love a little bling? My cute Blue Diamond quilt block, designed in facet art style, would make a sparkling quilt.

Below is the inspiration for my little diamond quilt. This stunning quilt titled Bling was designed, pieced, and quilted by Katherine Jones. Bling won Best in Show at the 2017 QuiltCon Quilt Show, and you can sure see why. The details in this quilt are stunning!
Hexagon Colour Wheel Mug Rug Patterns
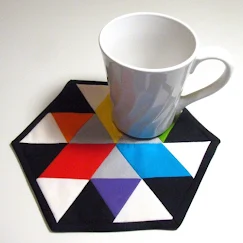
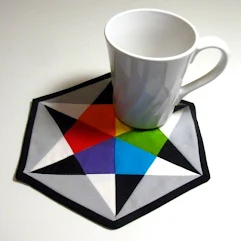
I'm introducing three new mug rug patterns to brighten your home for spring. The bright primary colours against white, black, and grey is a crisp combination. You could use these as potholders as well as mug rugs. They would look lovely in a modern kitchen. They would also be a great gift for an artist or art student. This is a good project for quilters just learning to foundation piece. Instructions assume basic knowledge in foundation piecing. The pattern includes instructions for all three mug rugs.

Pixel Beach Mini Quilt
Inspired by a day at the beach, Pixel Beach is a simple and elegant quilted wall hanging in a checkerboard of neutral tones. What a lovely addition to your summer beach house. Think warm summer sand, collecting pretty stones and sea glass on the shore while the gulls singing overhead. These were my inspirations for my new mini quilt pattern Pixel Beach.
My Urban Pathway Table Runner Kit at Connecting Threads
The Connecting Threads Spring 2017 catalogue came in the mail this week and I was excited to see my Urban Pathway table runner quilt kit there. The kit uses Shiny Objects by Flaurie & Finch for RJR. The line has a gorgeous metallic print. Thank you Anita and all the gang at Connecting Threads!
Update: July 20, 2021
This kit is no longer available at Connecting Threads but you can still buy this pattern at my Etsy Store.
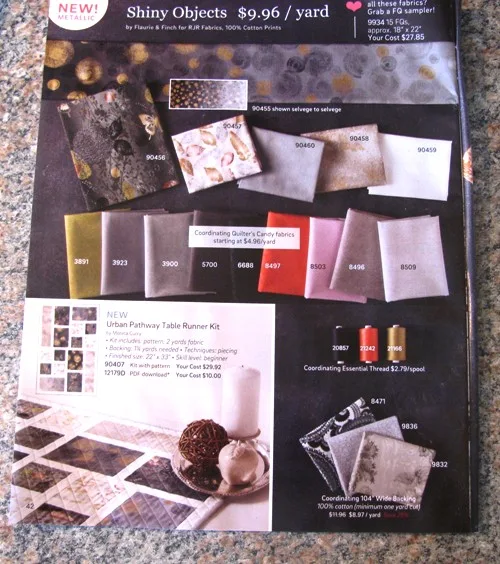 |
| Image from Connecting Threads Pattern Catalogue |
Grand Piano Hot Pad
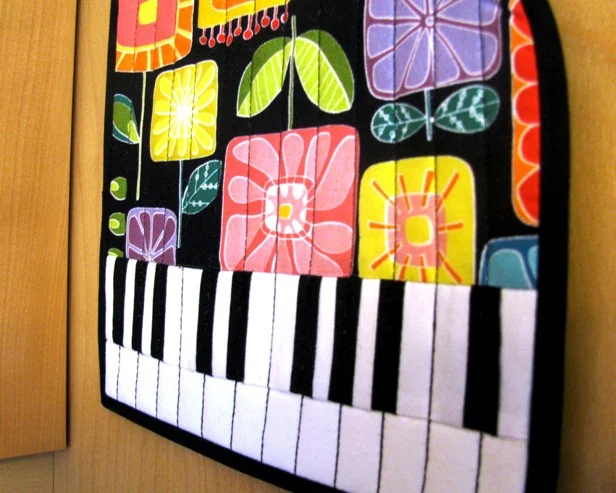
This cute Grand Piano quilted hot pad is sure to play a sweet note in your kitchen. The pattern uses one 10" square from your favourite Layer Cake and some black and white scraps. The keyboard is simple foundation paper piecing. The black bias binding completes it beautifully.
This hot pad pattern measures 12" x 9" (30cm x 22.5cm), which is the size of a small standard baking pan or dish.
TULIP BASKET Mini Quilt
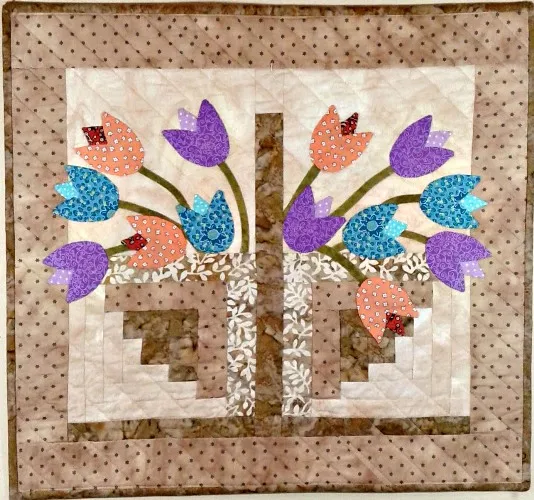
I'm excited to be introducing my newest mini quilt pattern Tulip Basket just in time for spring. The basket is two paper pieced log cabins, and the simple tulips are done in hand-stitched appliqué. It measures 19" x 18" (47.5cm x 45cm). This mini quilt uses a soft taupe colour palette inspired by the beautiful quilts by Japanese quilt artist Yoko Saito.
CELTIC TWIST Quilt Block | Step-by-Step Tutorial
This tutorial is for the 17" x 17" Celtic twist block shown above. It may look complicated, but it's simple to put together. There are no Y-seams and no templates to worry about. The block consists of two 6 inch units (one is a snowball block) and two different sized triangle units; that's it! You can make one block or add more units to make a quilt or table runner. I love this block for showcasing big prints.
 |
| These are the four units to make the block. |
MATERIALS NEEDED FOR ONE BLOCK
(All measurements include a 1/4 inch seam allowance)
Unit 1 - Makes 4
[8] 5" x 2" dark print
[8] 5" x 2" light print
[4] 3½" x 3½" medium print
Unit 2 - Makes 4
[1] 7¼" solid
Unit 3 - Makes 4
[2] 7" solid
[4] 2" x 2" dark print
Unit 4 - Makes 1
[1] 6½" x 6½" large print
[4] 2" x 2" light print
UNIT 1 - Make 4
1. Arrange your fabric pieces to ensure you have the correct colour placement. You'll need [2] 5" x 2" dark print; [2] 5" x 2" light print; and [1] 3½" square medium print to make one 6" block.

2. Place the square and first piece right sides facing and start stitching 1 inch from the top of the square.

3. Flip and press the first piece. Place the next piece right sides facing and stitch to end.

4. Flip and press the last piece you stitched. Place the next piece right sides facing and stitch to end.

5. Flip and press the last stitch pieced. Pull back and pine the first piece sewn on and pin back. Place the last piece right sides facing and stitch to end. Flip back and press.

6. Fold back the first piece as shown and stitch to just past the starting point of your first stitches.

7. Press completed block.

UNIT 2 (One square makes four triangles)
1. Cut [1] 7¼ solid colour square.
2. Cut the square diagonally to each corner to make four triangles.

UNIT 3 - Make 4
1. Pin one [1] 2" dark print square with right sides facing on opposite corners of the 7" solid colour square and stitch as shown. Cut a 1/4 inch seam allowance from each corner square, flip and press back.

2. Cut from corner to corner parallel to stitched corners to make two triangles.


UNIT 4 - Make 1
1. Cut [1] 6½ inch large print square and [4] 2" light print squares. Pin one 2" square with right sides facing on each corner of the larger square as shown.

2. Cut a corner inch seam allowance from each corner square, flip back, and press.


1. Cut [1] 6½ inch large print square and [4] 2" light print squares. Pin one 2" square with right sides facing on each corner of the larger square as shown.

2. Cut a corner inch seam allowance from each corner square, flip back, and press.


BLOCK ASSEMBLY DIAGRAM


Subscribe to:
Posts (Atom)


.jpg)

.jpg)



.jpg)

.jpg)


.jpg)


.jpg)


.jpg)



.jpg)
