Showing posts with label Tutorial. Show all posts

How to Make Multiple Half Square Triangles

How to Make Multiple Half Square Triangles


Make your quilts faster with these two easy-to-do methods for making multiple HST squares.


Make 4-in-1 HSTs

Instructions

  1.  Place squares right side facing.
  2.  Stitch 1/4 inch around the outside of the squares.
  3.  Make pencil lines dividing the squares from corner to corner.
  4.  Cut along these two lines.
  5.  Flip HST and press. Square Up if necessary.


Make 8-in-1 HSTs 

Instructions

  1.  Place squares right side facing.
  2.  Draw a line from corner to corner.
  3.  Stitch 1/4 inch away from the lines you drew.
  4.  Make pencil lines dividing the squares in four parts.
  5.  Cut along these two lines.
  6.  Cut from corner to corner being careful not to cut the stitch line.
  7.  Flip HST and press. Square Up if necessary.

Quilting with White Fabric: Pros & Cons

Quilting with White Fabric

White background fabrics make stunning quilts. The high contrast makes the colours pop. However, there are a few pitfalls when using white fabric that can be frustrating and even ruin your quilt. I made this featured quilt for my mother-in-law and almost didn't give it to her. But, I was in a crunch for time so I decided to gift it to her anyway and hope she didn't notice too many of the flaws. If she did notice, she never said anything.

TIPS FOR QUILTING WITH WHITE FABRIC

1.  USE A LIGHT COLOURED BACKING FABRIC

Because I was in a hurry, I used the quilt-as-you-go method to assemble this quilt. To make it "reversible" I used a variety of scrap layer cakes for the backing. I don't know if it was the batting (Hobbs Heirloom Fusible White Cotton) but the coloured background, as you can see below, showed right through to the front! Try using light coloured backing when using white.


2.  BUY ENOUGH WHITE FABRIC FROM THE SAME BOLT

When you buy your white fabric, purchase enough for the whole project. Even if white fabric is from the same dye lot and colour number, shades can vary slightly. I ran out of  white for this project and used left over white from another project. They looked the same under the studio lighting. But, when my hubby held up the quilt in the sunny kitchen, the left over white pieces definitely had a yellow cast.

3.  AVOIDING & FIXING "SHADOWS"

I love Foundation Paper Piecing (FPP) and have done many blocks using this technique. When I used a white fabric in a FPP project for the first time, however, frustrating "shadows" from the darker seams showed through.  Be sure to trim your darker seams before putting your blocks together. Also, check for any dark threads that my show through.

4.  BEST WAYS TO PREVENT FABRIC BLEED

Any quilt can bleed colours, but quilts with white backgrounds can be ruined by colour bleed. Here are a few tips to prevent this problem:
  • Prewash your fabrics, especially reds and purples.

  • When your quilt is finished, wash it alone on cool setting.  Add 1 cup of salt to the wash with a mild laundry soap.

  • "Color catchers" are another option. These are laundry sheets you put in your load to prevent colour runs while allowing mixed washes. There are several on the market you can try.

  • If there are only a few spots of bleed through on the white fabric after washing, spray the area with a mild water and bleach solution (3 part water to 1 part bleach in a spray bottle) rub with a small amount of Dawn dish soap and water.  
    My secret trick for getting stains and bleed off whites is Clorox Clean-Up® spray. It's normally used to clean hard surfaces but seems to work on fabrics as well.

Quilting Hack for Stray Threads and Seam Shadows by Thistledown and Company Quilts 


White Fabric: Is it worth the trouble? by Karen Brown at Just Get It Done Quilts

Make Super Easy Checkerboard Blocks - SCRAP BUSTER!

make super easy checkerboard blocks


INSTRUCTIONS

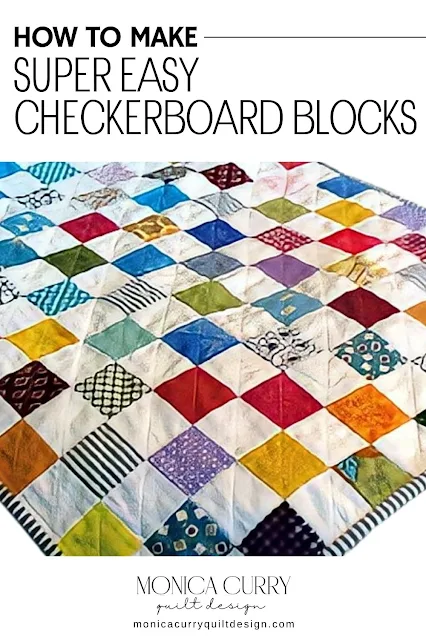
I discovered this technique for making scrap checkerboard blocks several years ago. I used it to make my grand-niece a doll quilt (above). With these few easy steps, the results are so worth it. When you're finished, every square will be aligned perfectly and you'll have a strong base to join the blocks so they won't stretch out of shape.

Finished Block: 12"x 12" (30 cm x 30 cm))

1.  First, you'll need a non-woven, lightweight, single-sided fusible interfacing. I purchased this very inexpensive one on Amazon.


2.  Cut [18] 2½-inch (6 cm) colour squares and [18] 2½-inch (6 cm) light colour squares.

3.  Cut [1] 13" x 13" (31 cm x 31 cm) square of interfacing.

4.  Place squares 1/2" from the edges on the adhesive side of the interfacing. Butt together the squares as shown below alternating between light and dark colours.


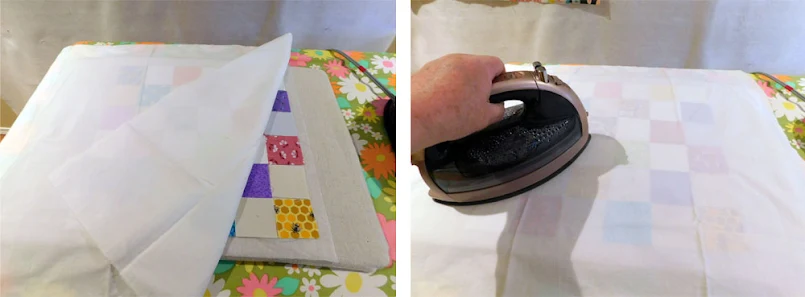
5.  Place a piece of cotton over the squares and press to adhere them to the fusible web.


6. Fold the first row right sides facing and sew a  "fat" 1/4" seam allowance. Repeat this until all the rows are stitched.


7.  Your first set of rows will look like this.


8.  Trim a about 1/8" off the edge of each seam row and press seam open. Be very careful to not cut the stitches!


9.  Stitch the horizontal rows and trim the seams the same as you did with the vertical rows.


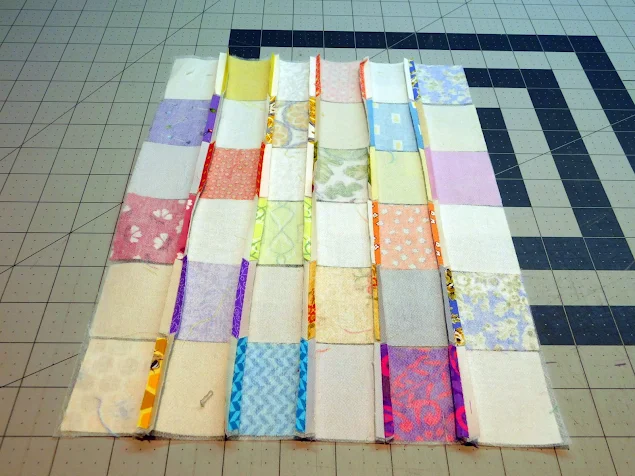
10.  Press down all your seams. This is what your stitched squares will look like from behind.


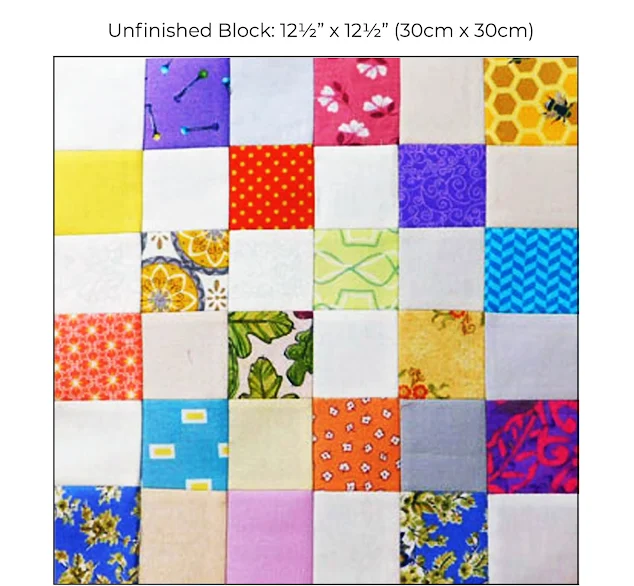
11.  Press block and square up if necessary. You can see how precisely the squares are lined up.


If you need help organizing your scraps before you start, go to my scrap sorting tutorials below:

Make Your Own Best Press Citrus Spray Starch

Make Your Own Best Press Citrus Spray Starch


Print Friendly and PDF

I love Mary Ellen's Best Press Spray. It helps my blocks press crisp and there's no starchy residue. The only downside is that it's way too expensive, especially here in Canada. Also, I don't like the smell of most of their scents; the lavender-scented spray smells like cheap men's cologne. I thought of using the scent-free Best Press, but it costs more than the scented. So, I decided to try making the homemade version of Best Press and I was pleased with the results.

I wanted my spray to have a nice scent but most of the recipes I found called for lavender essential oil and I didn't care for it. So, I tried the citrus essential oils (i.e. lemon, lemongrass, bergamot, orange, etc.) and loved the fresh citrusy scent. I use bergamot exclusively now. Bergamot is a fresh, uplifting Italian orange oil used for cosmetics and perfumes. Below is the recipe for the DIY Citrus Best Press that works just as well as the real deal. 


DIY CITRUS BEST PRESS (Makes 3 cups)

INGREDIENTS (Revised July 29, 2022)
  • 1½ cups distilled water (it must be distilled because some tap water minerals can stain your fabric).
  • 1½ cup vodka. Use only vodka because it is clear and odorless.
  • ¼ to ½ tsp. bergamot essential oil or any citrus essential oil.

Combine all ingredients. Store in a spray bottle. Shake well before each use.

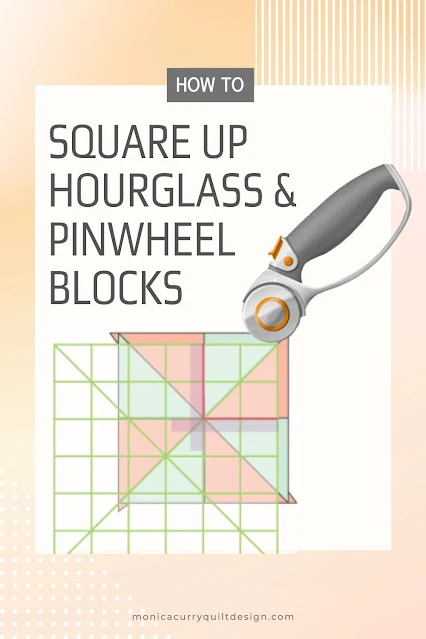
How to Square Up Hourglass & Pinwheel Blocks: No special ruler required!

This post is a supplementary tutorial for the Quick Block Calculator.

How to Square Up Hourglass & Pinwheel Blocks

When using the shortcut methods to make Hourglass and Pinwheel blocks, you often have to "square up" the block to the correct size you need. If these blocks are not squared up properly, you will end up with very wonky looking squares that will only be good for the scrap pile.

In this post, I'll show you a simple method for squaring up Hourglass, Pinwheel, and Half Square Triangle blocks that doesn't require a special ruler.

MATERIALS

INSTRUCTIONS

Hour Glass
  1. Divide the desired block size in half, e.g. 4½"÷ 2 = 2¼"
  2. Find this number on the ruler.
  3. Place a piece of tape horizontally and vertically on the ruler to mark the center of the block.
  4. Line up intersecting point of the tape with the center of the block.
  5. Line up the 45º angle with angle of the block.

6.  With a rotary cutter, cut off the exposed ends of the block.


7.  Turn the ruler and block 180º and, once again, line up the halfway point with the center of the block.


8.  With a rotary cutter, cut off the exposed ends of the block.


Pinwheel


Half Square Triangle

How to Make Quilted Bag Straps

How to Make Quilted Bag Straps


Apple Cider Market Tote aka Winslow Market Tote

I first saw this tote pattern in the 2018 issue of Make It! Patchwork. It was designed by Kathy Mack and was showcased on the Quilting Arts TV Episode #601. It was originally featured as the Winslow Market Tote and has since been renamed the Apple Cider Market Tote.

Apple Cider Market Tote made by Monica Curry
Pattern Design by Kathy Mack

I haven't made many bags, but I fell in love with this one as soon as I saw it. I wasn't sure, however, what fat quarters to use for it. When I finally dug through my stash, I found the perfect fabric for this tote ─ Into the Garden by Amanda Herring for Riley Blake. I bought this fat quarter bundle several years ago and loved it so much I didn't want to cut it! I also wanted to make pretty matching straps for this bag, but I wasn't sure how to make bag straps. I heard you could use quilt batting for straps and thought that this would be a great way to use up my batting scraps. After a YouTube search, I found a great tutorial for making bag straps with batting by sewing and crafting vlogger Alanda Craft. She uses fusible batting but says non-fusible works just as well. I think my straps turned out great.


Print Friendly and PDF

INSTRUCTIONS

(Also check out Bag Strap Making Video Tutorial by Alanda Craft)

1. Cut [2] fabric strips 5" x length of the strap and [2] quilt batting strips 2½" x length of the strap.


2. Fold the fabric strip in half lengthwise and press.


3. Make a lengthwise fold to the center of the strip on both sides and press.


4. Place batting in the center of the strip.


5. Fold each side of the fabric over onto the batting and press.


6. Fold the fabric and batting in half lengthwise and press.


7. To finish off your strap, stitch along both edges using a 1/8" or 1/4" allowance (Version 1). I find the strap is a little stronger if you add three more rows of stitching equally down the center. (Version 2).


How to Make French Fold Binding

How to Make French Fold Binding

Print Friendly and PDF

French Fold binding is one of the most popular quilt bindings and for good reason. Because the fabric is doubled, French Fold binding creates a durable edge for your quilt. It's particularly good for quilts and quilted items that are going to get a lot of laundering. It's a very simple binding to make. I use it on all my quilt projects. If you want to add a little flair to your French Fold binding, see my tutorial on French Fold with Flange binding.

HOW TO MAKE FRENCH FOLD BINDING

1) DETERMINE THE BINDING LENGTH YOU NEED
 
EXAMPLE: Finished quilt size = 54" × 60"
(54" × 2) + (60" × 2) + 10" = 238" (10" extra is added for finishing the binding).
(238" ÷ 36") = 6.6 yards
You will need 6.6 ≈ 7 yards of binding for a 54" × 60" finished quilt.
If making bias binding, cut your fabric strips on the diagonal before making your binding.

2) DETERMINE THE BINDING WIDTH YOU NEED

Decide on the binding width you need, then refer to the chart below to get the correct overall strip width for that binding. Important Note: When choosing a binding width, keep in mind your batting loft thickness.


3) CALCULATE HOW MANY STRIPS YOU NEED

EXAMPLE: 238" (length of binding needed in inches) ÷ 42" (fabric cross grain width) = 5.6 ≈ 6 strips

4) CALCULATE THE YARDAGE YOU WILL NEED TO MAKE FOR YOUR STRIPS

EXAMPLE: 2.5" (strip width) x 6 (number of strips needed) = 15" + 2" = 17" (2 inches is added to allow for possible uneven edges). Yardage Needed: 17" x 42"

5) MAKE THE BINDING


6) HOW TO ATTACH THE BINDING TO THE QUILT


How to Make Flange Quilt Binding


I love flange quilt binding. It gives quilts an elegant and finished look. I don't use it on all my projects, but sometimes a quilt needs that extra pop. Flange binding takes a little extra work, but it's well worth the effort when you see the finished result. I made the following tutorial as comprehensive as possible and hope it will help you give flange binding a try.


INSTRUCTIONS


1)  CALCULATE THE LENGTH OF BINDING YOU WILL NEED FOR YOUR QUILT


EXAMPLE:
Finished quilt size = 54" × 60"

  • (54" × 2) + (60" × 2) + 10" = 238" (10" extra is added for finishing the binding). 
  • (238" ÷ 36") = 6.6 yards
  • You will need 6.6 ≈ 7 yards of binding for a 54" × 60" finished quilt. 

2)  WIDTHS TO CUT FOR FLANGE AND MAIN COLOUR STRIPS

  1. Decide on a binding width you need.
  2. Use the chart below to get the widths to cut the strips for main colour and the flange.


3)  ASSEMBLING & ATTACHING BINDING


  1. Sew both strips together lengthwise with a 1/4" seam allowance.
    Press the seam towards the main colour strip.


  2. Fold the strips over lengthwise (wrong sides facing), line up the top edges and press.


  3. With right side of quilt down, stitch binding around the edge of the quilt
    with a ¼ seam allowance.


  4. Fold binding to the front of the quilt and stitch-in-the-ditch between the
    flange and the main colour.


DETERMINE YARDAGE NEEDED FOR BINDING STRIPS


1.  CALCULATE NUMER OF STRIPS TO CUT BASED ON YOUR FABRIC WIDTH

EXAMPLE 238" (length of binding in inches) ÷ 42" (fabric cross grain width) = 5.6 ≈ 6 strips


2.  CALCULATE THE YARDAGE NEEDED FOR YOUR STRIPS


MAIN STRIPS
EXAMPLE 
  • 1.25" x 6 (number of strips needed) = 7.5" + 2" = 9.5" (2" added for uneven edges).
  • Yardage needed for main colour strips: 9.5" x 42"
FLANGE STRIPS
EXAMPLE  
  • 1.5" x 6 (number of strips needed) = 9" + 2" = 11" (2" added for uneven edges).
  • Yardage needed for flange strips: 11" x 42"