Here is my newest table runner pattern, Garden Breeze, just in time for summer. I designed this project using the half-hexagon whirligig block in floral prints. The whirligig block is a traditional favourite and so simple to foundation piece. Anyone new to foundation piecing will love making this table runner.
Showing posts with label Foundation Paper Piecing. Show all posts
Showing posts with label Foundation Paper Piecing. Show all posts
Easter Blessings Banner
Easter is coming up quick and I was so glad to get this beautiful pattern Easter Blessings launched before the celebrations. This is a very simple project if you have basic skills in foundation paper piecing. The optional tabs are a nice touch to create a banner for your home or church.
Vintage Sewing Machine Mini Quilt
This is my most recent foundation pieced pattern, Vintage Sewing Machine mini quilt pattern. I have this piece in my studio and love the bright colours. It measures 15" x 15" (37.5cm x 37.5cm) and would make a perfect little project for your sewing room.
Feather Your Nest Table Runner
My new pattern launch for this month is my Feather Your Nest table runner pattern. I had been seeing the feather block all over the internet and had to make my own pattern for it. My method for making the feathers is simple. My instructions are thorough and easy to follow, so don't be afraid to jump right in and give it a try. This pattern is great for using up your scraps. The finished table runner is 38" x 14". The pattern also includes instructions for making a single 12" x 12" block shown below.
How to Accurately Cut Fabric for Foundation Paper Piecing
I first saw this technique in Simply Amazing Spiral Quilts by RaNae Merrill. I modified it slightly by using freezer paper. It's a simple and foolproof method for cutting your FPP fabric pieces. This method is especially great for when you have multiples of the same block.
INSTRUCTIONS
- Foundation piecing template that has been mirrored.
- 8½" x 11" sheet of freezer paper
- Scissors
- Rotary cutter
- Quilting ruler
- Fabrics for your block
- Coloured pencils or markers to match your fabrics.
2. Colour each section of the template with the fabric colour you want to use for that section. If a section is a white or cream colour, you can make a symbol to represent that colour or leave it blank.
3. Cut out each freezer paper section into separate pieces and lay them on the corresponding fabric with the right side of the fabric facing up. Leave a generous space all the way around each section. Press lightly with a hot iron to get the freezer paper to stick. If you need multiples of the same section, you can place the freezer paper sections on 4 to 5 layers of fabric.
4. With your quilt ruler, cut ¾ inch allowance around each section.
My favourite foundation piecing papers
Anyone who has done foundation paper piecing (FPP) knows how frustrating and tedious it is when struggling with bad piecing paper. I've tried most every FPP on the market. I've also tried various tissue papers, tracing papers, parchment paper, copy papers, phone book paper ... well, you get the picture. After all my research, my favourite FPPs are Fun-dation and Sulky Tear Away Stabilizer.
Because I do a lot of FPP for my designs, I was excited to see Fun-dation brand piecing paper go on sale recently at Amazon.ca for $5 CDN. I ordered five packages. A package has 25 sheets. I'm glad I ordered when I did because the price went back up to $7.69 CDN (which is still not too bad). Fun-dation brand FPP is the best I've used. It tears away beautifully, it's translucent enough for fabric placement, and it prints well; I love this stuff. One package of Fun-dation works out to about 0.31 cents a sheet.
 |
| Fun-dation Foundation Piecing Paper |
Another very good option for FPP is Sulky Tear-Easy Stabilizer in the 12" x 11 yards roll ($15.11 CDN at Amazon). Sulky Tear-Easy is very much like Fun-dation. An 11-yard roll of Sulky makes [47] 8.5 inch wide sheets at 0.32 cents a sheet.
 |
| Sulky Tear-Easy Stabilizer |
Blue Diamond Quilt Block
Who doesn't love a little bling? My cute Blue Diamond quilt block, designed in facet art style, would make a sparkling quilt.

Below is the inspiration for my little diamond quilt. This stunning quilt titled Bling was designed, pieced, and quilted by Katherine Jones. Bling won Best in Show at the 2017 QuiltCon Quilt Show, and you can sure see why. The details in this quilt are stunning!
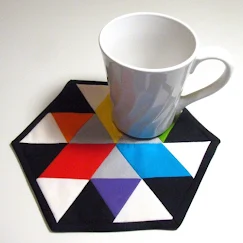
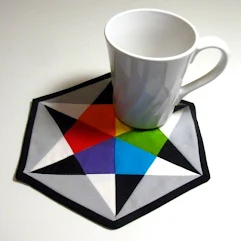
Hexagon Colour Wheel Mug Rug Patterns
I'm introducing three new mug rug patterns to brighten your home for spring. The bright primary colours against white, black, and grey is a crisp combination. You could use these as potholders as well as mug rugs. They would look lovely in a modern kitchen. They would also be a great gift for an artist or art student. This is a good project for quilters just learning to foundation piece. Instructions assume basic knowledge in foundation piecing. The pattern includes instructions for all three mug rugs.

Phone book paper for foundation piecing
I decided to make my quilt using the Hunter's Star quilt block because I love the block and it ties in with Canada's fur trade history. Hunting and trapping, especially beaver, was how Canada began.
There are several ways to make a Hunter's Star block. I chose to use foundation piecing because it's the technique I'm most comfortable with. However, this left me with a dilemma. I needed 48 blocks to make the quilt, but I didn't want to use 48 expensive sheets of foundation paper for the project. I know phone book paper is used for strip piecing, so I thought I'd try using it for foundation piecing. I was very pleased with the results. The phone book paper printed beautifully with my inkjet printer. If this were a complicated template, it might be hard to read, but it was perfect for this block. This paper is very light but doesn't curl up with normal iron heat and it tears away easily. Honestly, if I could get my hands on some of this paper not printed I'd buy a box of it.
The Pros and Cons of Using Phone Book Paper for Paper Piecing
PROS
The Pros and Cons of Using Phone Book Paper for Paper Piecing
PROS
- Very light but strong enough to be handled.
- Prints very well in an inkjet (not tested on a laser printer).
- Tears away with no effort at all.
- Doesn't curl up with the heat.
CONS
- Somewhat difficult to read the template
- Not a nice 8½" x 11" sheet of paper.
- Can't see through it.
How to Print Your Template Onto Phone Book Paper
Because phone book paper has to be cut slightly smaller than normal letter-sized paper, use this method to print your templates.
Because phone book paper has to be cut slightly smaller than normal letter-sized paper, use this method to print your templates.
- Copy your templates onto an 8½" x 11" sheet of paper.
- Cut out phone book pages to about 7¾ " to 8" wide.
- Cut a piece of white paper to the same size as your phone book paper.
- Cut out templates and paste or tape them down onto the smaller white piece of paper.
- Place phone book paper in your printer paper tray and adjust the paper width bars to the width of your paper.
- Center the template page on the printer bed and photocopy it onto the phone book paper.
Grand Piano Hot Pad
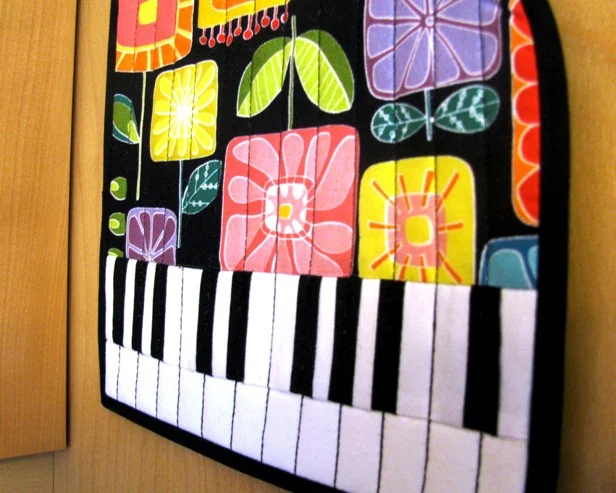
This cute Grand Piano quilted hot pad is sure to play a sweet note in your kitchen. The pattern uses one 10" square from your favourite Layer Cake and some black and white scraps. The keyboard is simple foundation paper piecing. The black bias binding completes it beautifully.
This hot pad pattern measures 12" x 9" (30cm x 22.5cm), which is the size of a small standard baking pan or dish.
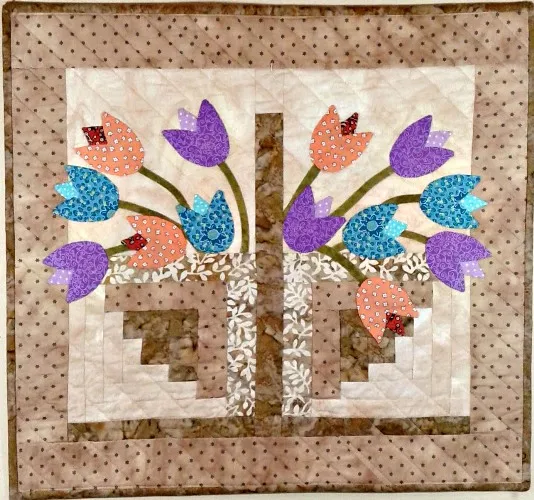
TULIP BASKET Mini Quilt
I'm excited to be introducing my newest mini quilt pattern Tulip Basket just in time for spring. The basket is two paper pieced log cabins, and the simple tulips are done in hand-stitched appliqué. It measures 19" x 18" (47.5cm x 45cm). This mini quilt uses a soft taupe colour palette inspired by the beautiful quilts by Japanese quilt artist Yoko Saito.
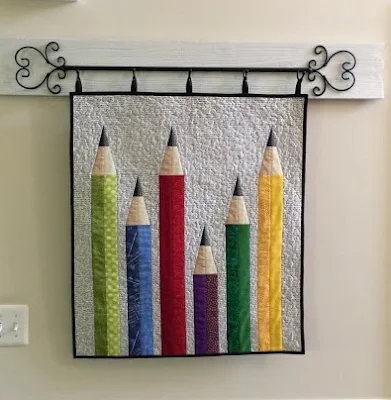
Polly makes my pencil quilt
One of the most rewarding things as a quilt designer is seeing how other quilters interpret my patterns. I was so pleased to recently see one of my most popular patterns, Pencil Me In, created by Polly at Aunt Polly's Porch. I think she did a beautiful job with this pattern. Her colour choices are stunning, and I love the hanging tabs she put on the top.
Subscribe to:
Posts (Atom)


.jpg)


.jpg)


.jpg)


.jpg)



.jpg)
