Showing posts with label Patterns. Show all posts
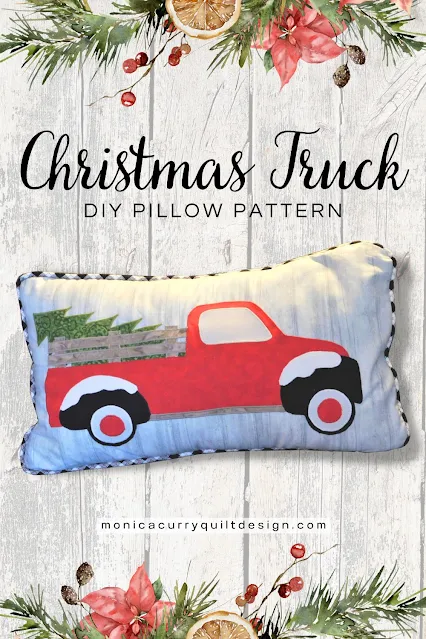
Little Red Truck: A Christmas Classic
Although I'm not a vintage car enthusiast, but I love old trucks. I think this Little Red Truck is one of my cutest appliqué patterns yet. The finished pillow measures 20" x 12" and has a envelope back. The piping finishes it off nicely but this is optional. If you love the look of piping but not sure how to do it, the pattern has a link to a video tutorial on how to make and add piping to a pillow.
Moroccan Tile Mini Quilt
I used to do mosaic art years ago and still appreciate this beautiful art form. Moroccan mosaic tilework is my favourite type of mosaic art because it reminds me of elaborate quilts. I've always wanted to replicate this art style in fabric and this year I finally did. The result is my newest pattern, Moroccan Tile Mini Quilt. This pattern may look a bit complicated but it really is simple, even for beginners. All straight cuts and no templates required! Go to my link to learn how to create a flange binding aka faux piping for the project.
Precious Bundle Baby Quilt now Charm Pack friendly!
One of the first quilt patterns I ever designed was the Precious Bundle baby quilt. That was five years ago. But, for whatever reason, I didn't design it for precuts. I'll chalk that up to inexperience.
For 2020, I redesigned this gorgeous baby quilt for charm packs. I'm hoping this will make it easier for even the most novice quilter. The only fabrics you will now need to make the Precious Bundle quilt top is one print charm pack, one solid white charm pack, and 1¼ yard white. How simple is that?!
Buy this pattern at my Etsy Store
Round Table Placemat
If you have a round table for your home, why not make a few of these elegant-looking "round" placemats. They fit beautifully on a 42 inch and up dining table. I think they look much nicer on a round table than the traditional rectangle placemats.
The placemat patterns come in three styles that are very easy to make: a reversible, seven-wedge, and nine-wedge placemat. All the templates are full page printable.


Buy this pattern at my Etsy Store
Garden Breeze Table Runner
Here is my newest table runner pattern, Garden Breeze, just in time for summer. I designed this project using the half-hexagon whirligig block in floral prints. The whirligig block is a traditional favourite and so simple to foundation piece. Anyone new to foundation piecing will love making this table runner.
Easter Blessings Banner
Easter is coming up quick and I was so glad to get this beautiful pattern Easter Blessings launched before the celebrations. This is a very simple project if you have basic skills in foundation paper piecing. The optional tabs are a nice touch to create a banner for your home or church.
Vintage Sewing Machine Mini Quilt
This is my most recent foundation pieced pattern, Vintage Sewing Machine mini quilt pattern. I have this piece in my studio and love the bright colours. It measures 15" x 15" (37.5cm x 37.5cm) and would make a perfect little project for your sewing room.
Buy this pattern at my Etsy Store
Feather Your Nest Table Runner
My new pattern launch for this month is my Feather Your Nest table runner pattern. I had been seeing the feather block all over the internet and had to make my own pattern for it. My method for making the feathers is simple. My instructions are thorough and easy to follow, so don't be afraid to jump right in and give it a try. This pattern is great for using up your scraps. The finished table runner is 38" x 14". The pattern also includes instructions for making a single 12" x 12" block shown below.
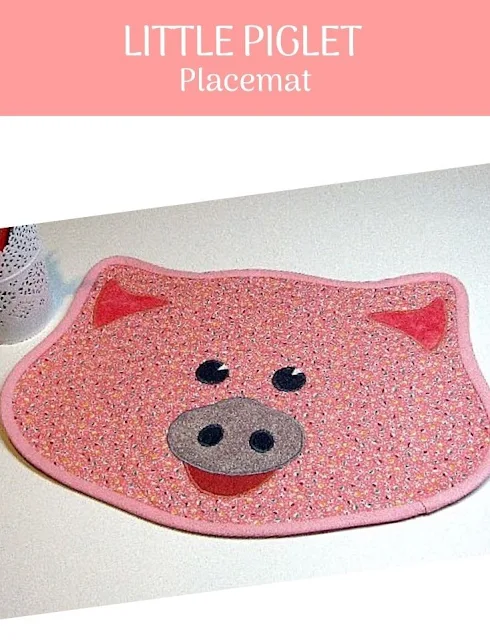
Springtime on the farm means babies!
This spring I'm launching two new placemat patterns, Baby Jersey and Little Piglet. Aren't they adorable? I'm sure your child or grandchild would love one of these to make mealtime fun. These placemats are easy to make using fusible appliqué and simple straight line quilting.
My Easter Egg table runner featured at Connecting Threads
This is my second pattern to be kitted by Connecting Threads. It's my Easter Egg Table Topper. The Easter fabric Eggstraordinary by Connecting Threads was perfect for this project. Buy the kit at Connecting Threads. Buy the pattern HERE.
Holiday Magic Wall Quilt Pattern
Talk about getting a pattern project finished under the wire. I really wanted to have the pattern launch done for my Holiday Magic wall quilt long before Christmas, but Christmas preparations and our new puppy took up most of my time. I love, love, love this pattern and I think you will too. It's made up of simple foundation piecing and fusible web applique. I think it would be stunning in any Christmas fabric. Anyone with basic applique and foundation piecing skills will have no trouble doing this up quickly.
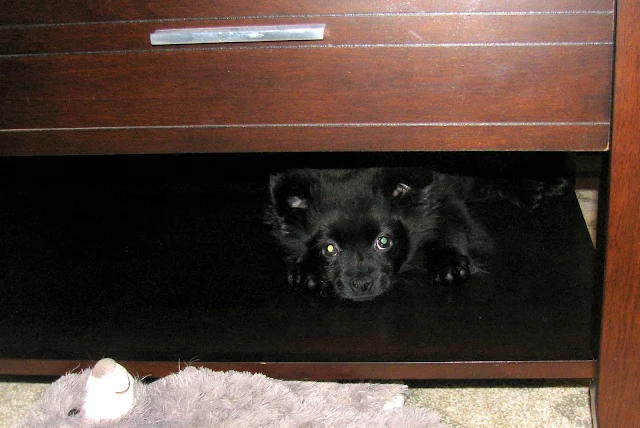
We had our own Holiday Magic this Christmas. Here is our little Pomeranian-cross puppy, Teddy. We adopted him a few weeks ago, and he's settling in quite well although Sophie can be a little impatient with him.
Buy this pattern at my Etsy Store
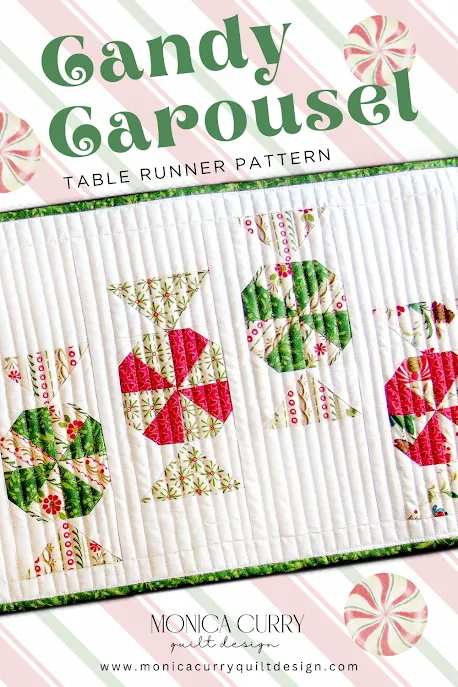
Candy Carousel Table Runner
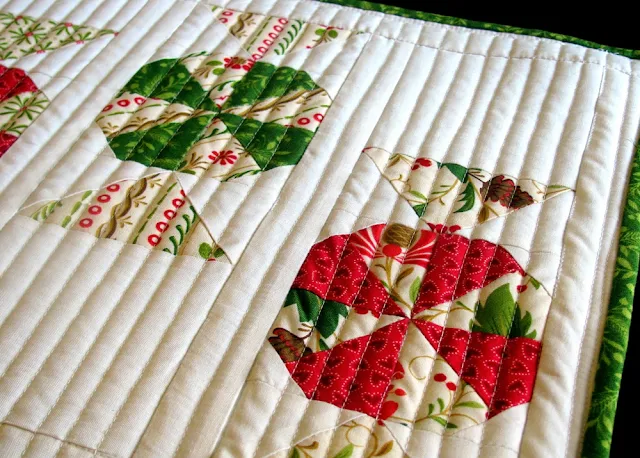
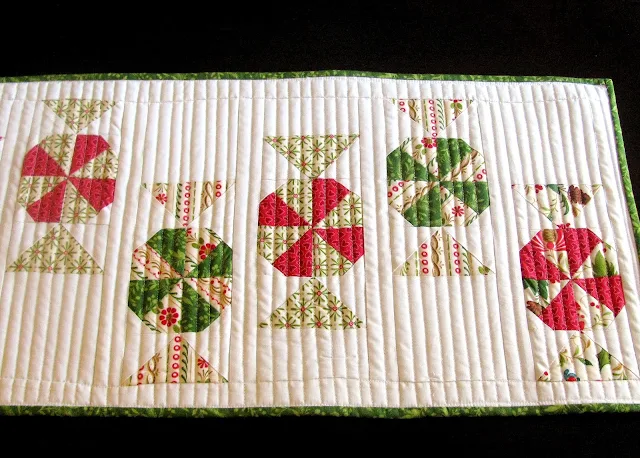
My newest pattern, Candy Carousel, was inspired by Christmas peppermint candies. This table runner pattern is simple and modern. It would make an excellent project for the confident beginner. Pattern includes instructions for making quick pinwheel blocks.
Buy this pattern at my Etsy Store
Halloween Witchy Boots
Halloween is almost here again. This is my favourite time of year. Costume parties, treats, tricks, and spooky stuff; I love it all. Today I'm launching my new Halloween pattern Witchy Boots for 2017. This mini quilt is a simple applique pattern that's perfect for a confident beginner. The finished size is 13" x 15" (32.5cm x 37.5cm).
The pattern was inspired by the image from the Wizard of Oz (1939) of the Wicked Witch of the East's boots after Dorothy's house crushes her. Dorothy had a whole mess of problems after that. My version looks the Wicked Witch of the East was stuffed in a trash can, but you get the idea.
Three DIY Pin Cushion Ideas with Tutorials and Free pattern

1. How to Make a Vintage Planter Pin Cushion
Pin cushions are an absolute necessity in any sewing studio. You usually don't realize this until you don't have one around when you need it. If you go online or on Pinterest, you'll see hundreds of different variations of a pin cushion. There was, however, one pin cushion I fell in love with. It's the vintage planter pin cushion.
I came across these little cuties at Lovely Little Handmaids and knew I had to make one. I picked up a vintage planter at the flower shop and, in no time, I made this adorable little pin cushion. See the instructions below to make your own. I think they would make great gifts for your sewing friends.
You can probably find one of these little planters at a thrift shop or rummage sale for a few cents. You may also want to check out your local florist shop to see if they have any kicking around from days gone by. That's where I found mine.
I came across these little cuties at Lovely Little Handmaids and knew I had to make one. I picked up a vintage planter at the flower shop and, in no time, I made this adorable little pin cushion. See the instructions below to make your own. I think they would make great gifts for your sewing friends.
INSTRUCTIONS
You can probably find one of these little planters at a thrift shop or rummage sale for a few cents. You may also want to check out your local florist shop to see if they have any kicking around from days gone by. That's where I found mine.
Step One
To give the pin cushion extra weight, glue pebbles to the bottom of the container with a glue gun.
Step Two
Measure the diameter of the opening of the container and cut a circular piece of fabric two inches larger than this measurement.
Step Three
With a strong thread, stitch around the edge of the fabric. Pull the thread to gather the fabric leaving an opening large enough to insert the filler.
Step Four
Stuff the fabric with lots of filler then tighten the thread and secure it with a knot.
Step Five
With a glue gun, apply hot glue around the inner edge of the container. Place the "fabric ball" into the container making sure it adheres to the glue.
2. How to Make a Juki 2010Q Wrap-Around Pin Cushion
I recently made this pin cushion for my new Juki 2010Q. I can't work unless this is wrapped around my machine. Don't you love the thread spools fabric? It's from the Cute As a Button fabric line by Delphine Cubitt. NOTE: This pattern can be customized to fit any sewing machine by adjusting the length of the end straps.

MATERIALS
- [2] 4" x 24" strips of fabric of your choice.
- [2] 1" pieces of hook and loop tape (Velcro®).
- Toy stuffing or leftover quilt batting.
INSTRUCTIONS
1. Layer the two fabrics and fold in half at the center.

3. With right sides facing, stitch a 1/4 inch seam from end to end as seen below. Leave the ends open, and leave a 3 inch opening on one side.


4. Turn stitched piece right side out and press.


5. Fold the piece in half vertically and place the template on it.
6. With a fabric marker or pencil, mark on the fabric the vertical lines on the template.
7. Stitch both vertical lines.

9. Fold in both ends 1/4 inch and stitch closed.
10. Stitch on the hook and loop tape at each end.
3. The Classic Mason Jar Pin Cushion
This is my go-to pin cushion for small mending jobs. The Mason jar (mine is a Gem jar) pin cushion is an all-time classic. You can find hundreds of these on Pinterest. There's that cute thread spool fabric again. Here's a great tutorial from The Seasoned Homemaker.
4. How to Make a Picture Frame Pin Cushion
Here is another pin cushion idea I used for my Pfaff machine. If you don't have any buttons on the front of your sewing machine, this pin cushion works great and looks ultra stylish.INSTRUCTIONS
- Get a small pretty frame and remove the backing and glass.
- Cut a piece of thin cardboard the size of the backing.
- Cut a piece of fabric one inch larger than the cardboard piece.
- Glue some stuffing to the cardboard.
- Wrap and glue the fabric edges 3/4 of the way around the stuffing and the cardboard and let dry.
- Add more stuffing as needed and finish gluing fabric edges to the cardboard.
- Put the stuffed cardboard through the frame.
- Re-attach the frame backing to hold cushion in place.
- Use sticky-back Velcro® to adhere the finished pin cushion to the front of the sewing machine.
Little Puppy Placemat
Last week I launched my cute Kitty Cat placemat pattern. This week I'm introducing its partner, my new Little Puppy placemat. Both placemats are great for kids or grand-kids, but could also be used as hot pads in the kitchen. They are simple to make with basic fusible appliquè. This pattern is perfect for the confident beginner who wants to learn bias binding and fusible appliquè.
Buy this pattern at my Etsy Store
Subscribe to:
Posts (Atom)