My Urban Pathway Table Runner Kit at Connecting Threads

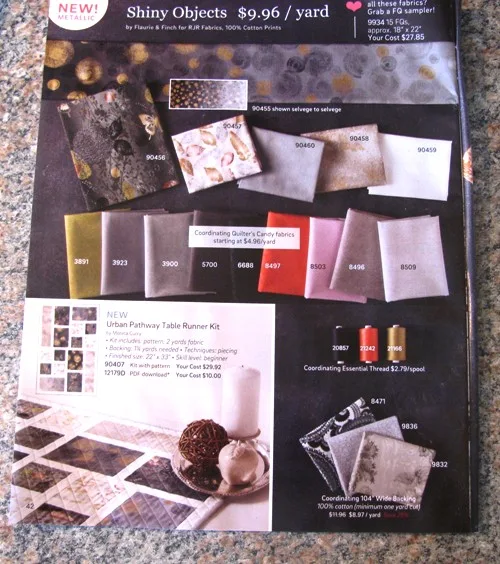
The Connecting Threads Spring 2017 catalogue came in the mail this week and I was excited to see my Urban Pathway table runner quilt kit there. The kit uses Shiny Objects by Flaurie & Finch for RJR. The line has a gorgeous metallic print. Thank you Anita and all the gang at Connecting Threads!

Update: July 20, 2021
This kit is no longer available at Connecting Threads but you can still buy this pattern at my Etsy Store.


monica curry connecting threads magazine
Image from Connecting Threads Pattern Catalogue


shiny object fabric collection urban patheay
Image from Connecting Threads Pattern Catalogue

Grand Piano Hot Pad

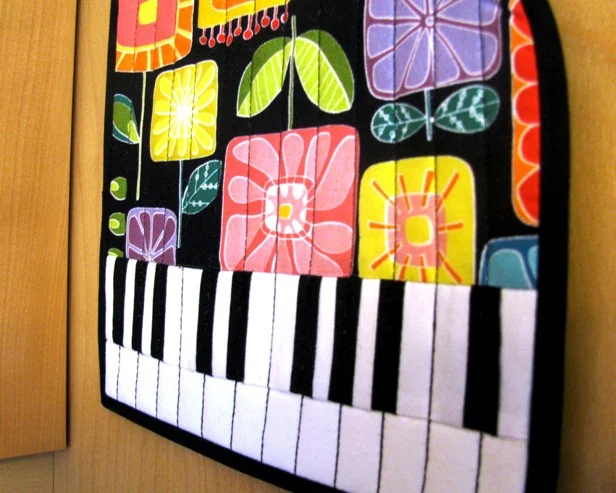
This cute Grand Piano quilted hot pad is sure to play a sweet note in your kitchen. The pattern uses one 10" square from your favourite Layer Cake and some black and white scraps. The keyboard is simple foundation paper piecing. The black bias binding completes it beautifully.


grand piano quilted hot pad pattern

This hot pad pattern measures 12" x 9" (30cm x 22.5cm), which is the size of a small standard baking pan or dish.

grand piano quilted hot pad pattern - detail 1

I choose bright colours to set off the contrast of the black and white keyboard. Any print would look gorgeous for this project, and the black binding ties everything together, but I think a print with even a little black in it really creates a nice balance of colour.

grand piano quilted hot pad pattern - detail 2


TULIP BASKET Mini Quilt

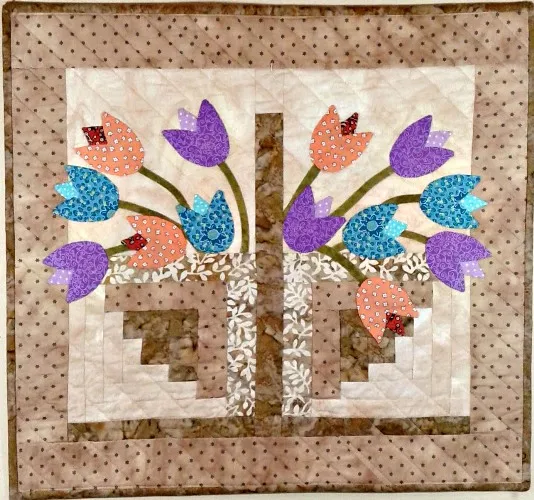
I'm excited to be introducing my newest mini quilt pattern Tulip Basket just in time for spring. The basket is two paper pieced log cabins, and the simple tulips are done in hand-stitched appliqué. It measures 19" x 18" (47.5cm x 45cm). This mini quilt uses a soft taupe colour palette inspired by the beautiful quilts by Japanese quilt artist Yoko Saito.


tulip basket mini quilt applique pattern

I think the rich tones of the tulips are stunning against the quiet neutrals. If you have basic appliqué and paper piecing skills, you can make this cheery spring project in no time at all. Hand stitched appliqué or fusible appliqué are both suitable for this project.

tulip basket mini quilt applique pattern detail

CELTIC TWIST Quilt Block | Step-by-Step Tutorial


This tutorial is for the 17" x 17" Celtic twist block shown above. It may look complicated, but it's simple to put together. There are no Y-seams and no templates to worry about. The block consists of two 6 inch units (one is a snowball block) and two different sized triangle units; that's it! You can make one block or add more units to make a quilt or table runner. I love this block for showcasing big prints.

These are the four units to make the block.

MATERIALS NEEDED FOR ONE BLOCK
(All measurements include a 1/4 inch seam allowance)

Unit 1 - Makes 4
[8] 5" x 2" dark print
[8] 5" x 2" light print
[4] 3½" x 3½" medium print

Unit 2 - Makes 4
[1] 7¼" solid

Unit 3 - Makes 4
[2] 7" solid
[4] 2" x 2" dark print

Unit 4 - Makes 1
[1] 6½" x 6½" large print
[4] 2" x 2" light print

UNIT 1 - Make 4

1. Arrange your fabric pieces to ensure you have the correct colour placement. You'll need [2] 5" x 2" dark print; [2] 5" x 2" light print; and [1] 3½" square medium print to make one 6" block.


2. Place the square and first piece right sides facing and start stitching 1 inch from the top of the square.


3. Flip and press the first piece. Place the next piece right sides facing and stitch to end.


4. Flip and press the last piece you stitched. Place the next piece right sides facing and stitch to end.


5. Flip and press the last stitch pieced. Pull back and pine the first piece sewn on and pin back. Place the last piece right sides facing and stitch to end. Flip back and press.


6. Fold back the first piece as shown and stitch to just past the starting point of your first stitches.


7. Press completed block.


UNIT 2 (One square makes four triangles)

1. Cut [1] 7¼ solid colour square.
2. Cut the square diagonally to each corner to make four triangles.


UNIT 3 - Make 4

1. Pin one [1] 2" dark print square with right sides facing on opposite corners of the 7" solid colour square and stitch as shown. Cut a 1/4 inch seam allowance from each corner square, flip and press back.

2. Cut from corner to corner parallel to stitched corners to make two triangles.


UNIT 4 - Make 1

1. Cut [1] 6½ inch large print square and [4] 2" light print squares. Pin one 2" square with right sides facing on each corner of the larger square as shown.


2. Cut a corner inch seam allowance from each corner square, flip back, and press.


BLOCK ASSEMBLY DIAGRAM

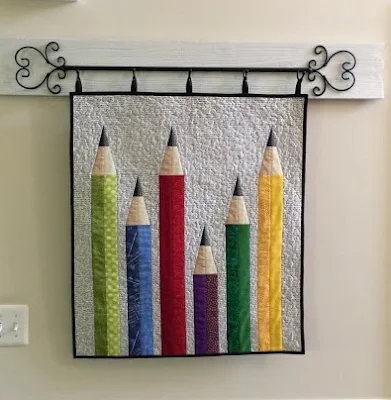
Polly makes my pencil quilt

One of the most rewarding things as a quilt designer is seeing how other quilters interpret my patterns. I was so pleased to recently see one of my most popular patterns, Pencil Me In, created by Polly at Aunt Polly's Porch. I think she did a beautiful job with this pattern. Her colour choices are stunning, and I love the hanging tabs she put on the top.