Make Super Easy Checkerboard Blocks - SCRAP BUSTER!

make super easy checkerboard blocks


INSTRUCTIONS

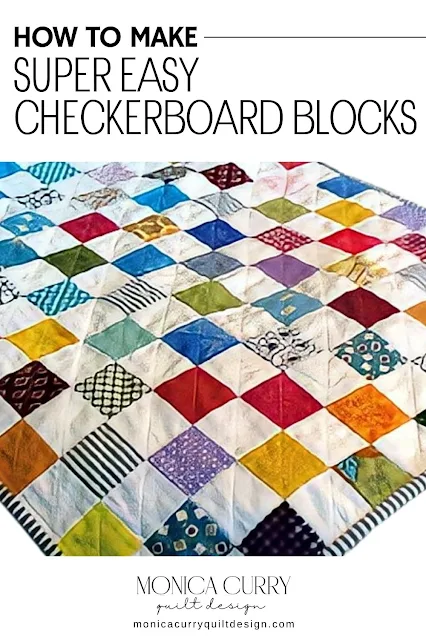
I discovered this technique for making scrap checkerboard blocks several years ago. I used it to make my grand-niece a doll quilt (above). With these few easy steps, the results are so worth it. When you're finished, every square will be aligned perfectly and you'll have a strong base to join the blocks so they won't stretch out of shape.

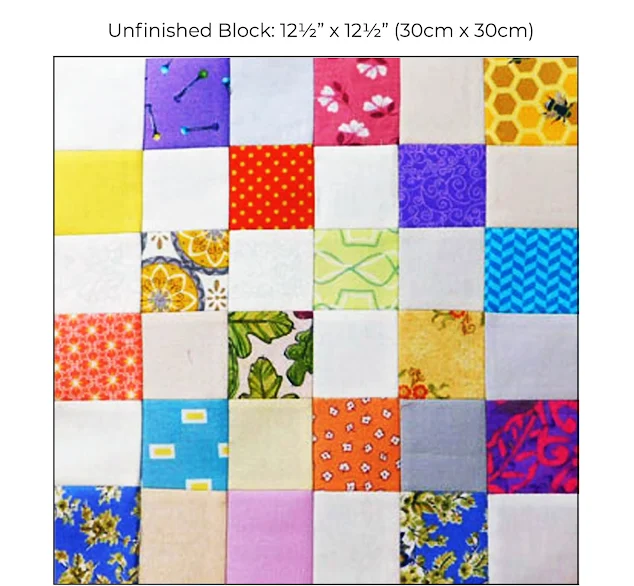
Finished Block: 12"x 12" (30 cm x 30 cm))

1.  First, you'll need a non-woven, lightweight, single-sided fusible interfacing. I purchased this very inexpensive one on Amazon.


2.  Cut [18] 2½-inch (6 cm) colour squares and [18] 2½-inch (6 cm) light colour squares.

3.  Cut [1] 13" x 13" (31 cm x 31 cm) square of interfacing.

4.  Place squares 1/2" from the edges on the adhesive side of the interfacing. Butt together the squares as shown below alternating between light and dark colours.


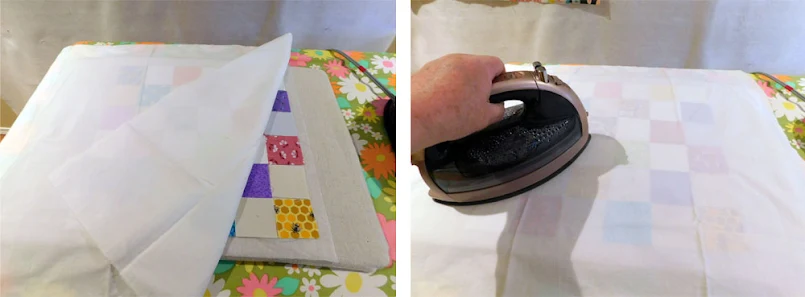
5.  Place a piece of cotton over the squares and press to adhere them to the fusible web.


6. Fold the first row right sides facing and sew a  "fat" 1/4" seam allowance. Repeat this until all the rows are stitched.


7.  Your first set of rows will look like this.


8.  Trim a about 1/8" off the edge of each seam row and press seam open. Be very careful to not cut the stitches!


9.  Stitch the horizontal rows and trim the seams the same as you did with the vertical rows.


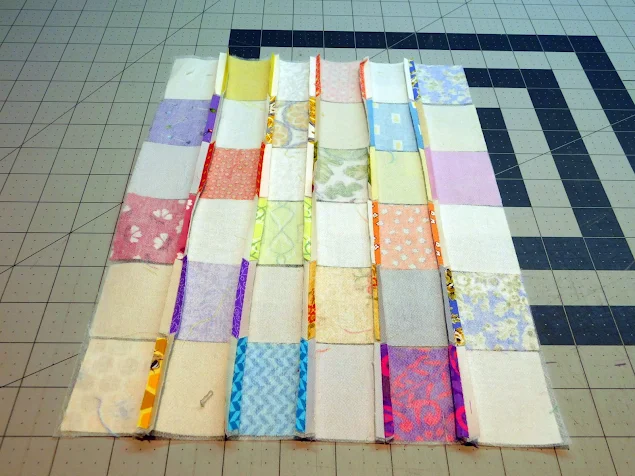
10.  Press down all your seams. This is what your stitched squares will look like from behind.


11.  Press block and square up if necessary. You can see how precisely the squares are lined up.


If you need help organizing your scraps before you start, go to my scrap sorting tutorials below:

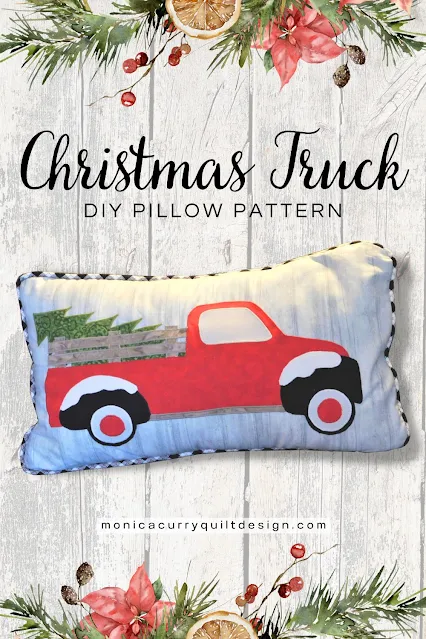
Little Red Truck: A Christmas Classic

I'm not a vintage car enthusiast, but I love old trucks. I think this Little Red Truck is one of my cutest appliqué patterns yet. The finished pillow measures 20" x 12" and has a envelope back. The piping finishes it off nicely but this is optional. If you love the look of piping but not sure how to do it, the pattern has a link to a video tutorial on how to make and add piping to a pillow.

Red Christmas Truck Pillow Pattern

Buy pattern at my Etsy store


The more things change . . .

                        . . . the more they stay the same.


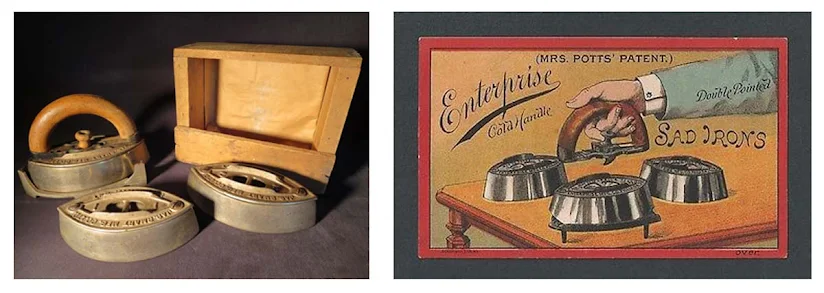
I bought two irons this month that were manufactured over 100 years apart and was intrigued by how similar they were in design. Both have a double point base, a rounded handle, and need to be placed on a heat source before ironing. The technology for each iron was vastly different, but the concept was the same.

I bought the older iron at my favourite antique shop. It's a Mrs. Potts Cold Handle Sad Iron. The "sad" in sad iron is from the Middle English word sad which meant solid or heavy. 

The second iron was a Panasonic Cordless 360° Freestyle™ Steam/Dry Iron. This iron is so similar to the Sad Iron I suspect the designers at Panasonic really knew their clothes iron history.

Mrs. Mary Florence Potts


Who is Mrs. Potts and What is a Sad Iron?

Mrs. Potts was born Mary Florence Webber in 1850 in Iowa, US. When she was 17 she married Joseph Potts who was a Civil War veteran 17 years her senior.

In 1871, at 19 years old, Mrs. Potts patented the Cold Handle Sad Iron changing the clothing iron industry forever and making her one of the most famous woman of her time. The wooden handle stayed cool for ironing and was detachable so that the user could keep several iron bases on the stove at one time then switch to a new hot iron when the first iron cooled.


The Sad Iron Kit

When Sad Irons came on the market in the late 1800s the Mrs. Potts Sad Iron Set sold for a whopping 0.70 cents! The set came with three iron bases, a detachable wooden handle, and a trivet. You could also buy the bases separately if you needed more.

Sad Irons were used well into the 1940s; mainly because some rural communities still didn't have electricity. The Sad Iron was manufactured until 1951.

Sad Iron Kit and Trading Card

Sad Iron Kit and Trade Card


Sad Iron Trading Cards

Trade cards were a very popular form of advertising in Victorian times and thousands were used to  advertise the Potts' Sad Iron. The cards were quite comical and sometimes quite racist.


THE CHILDREN CRY FOR IT

I guess the message in this trading card is
"So easy a child can use it." Sure. What could go wrong?

GIRL: "Oh Ma! I want to stay home and iron, this new iron is so nice."
MOTHER: "What? Not gone to school yet. You'll catch it."


MRS. POTTS IRON VS THE THERMOMETER

Not sure what the message is in this trading card.
Maybe the woman loves using her new Sad Iron so much
she's heating up the house with it? How much ironing does this woman have?!

HUSBAND: "Gracious! Do stop ironing. I am sweating fearfully just sitting here."
WIFE: "Well dear, you know I use those Mrs. Potts' Cold Handle Sad Irons
and I am just delighted with them."


THE WATERMELON SEASON AT BLACKSVILLE

Blacksville?! 
This trade card suggests using the Sad Iron as a compress for a
child's stomach ache?! And it's racist AF!

WOMAN: "Ah Chile. Yous bin eatin' dem watermillyons. Come yere honey.
I'll just put dis ere Mrs. Potts' Iron to yer stomach. It retains
de heat and an will help yer. Dis season is bad for the chillum."

I'm finally a member of the 241 Tote Club!


This is the 241 Tote by Noodlehead. I've been meaning to make this cute bag for a couple of years now and finally finished it this summer. It was a fun bag to make. The 241 Tote is all over Pinterest so there's no shortage of fabric ideas for it. I would say the pattern is for people with some bag making experience, but it really isn't too difficult. 

Why is it called the 241 Tote? Anna Graham (Noodlehead) explains the pattern's name.
"It's called the 241 Tote because it's like two patterns in one (two for one)! One version of the bag has two exterior side pockets (great for beginners), the other has two exterior zippered pockets (for those who might want a bit of a challenge)."
The fun part was picking out the fabrics. I decided I wanted this bag to be as bright and as cheery as possible. I believe I accomplished that 😊. These bright fabrics were in my scrap bin and I was happy I could finally use them for something.

241 Tote made by Monica Curry
Designed by Anna Graham aka Noodlehead

It's the details that make this bag. The zipper pouch is perfect for my phone.

My Pretty Mini Quilt Published!

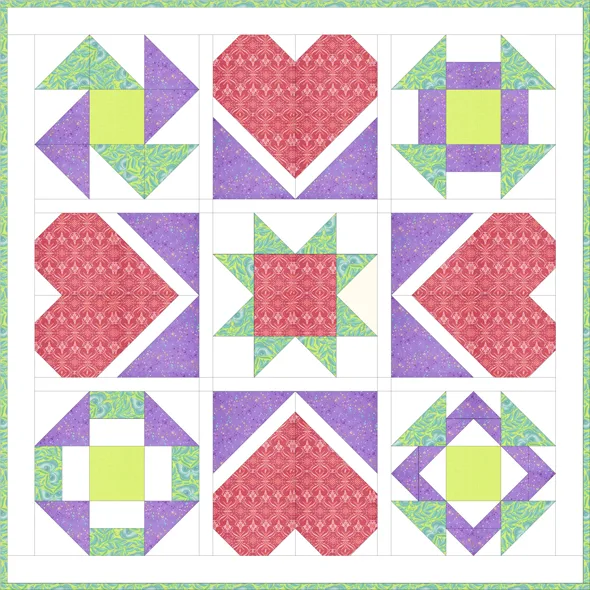
I'm so pleased to announce that my pretty mini quilt "I 💗 Quilting" has been published in "Miniature Quilts: 12 Tiny Projects That Make a Big Impression" by Leisure Arts.

I Heart Quilting
I 💗 Quilting by Monica Curry

This quilt was created with Tula Pink's gorgeous Pinkerville fabric line. The pattern is a great sampler for beginners. It has five traditional blocks and a simple foundation paper pieced (FPP) heart that would be a good introduction too this FPP. I will be sending an update to all my subscribers when the pattern becomes available in my Pattern Store.


BUY BOOK HERE

Moroccan Tile Mini Quilt

I used to do mosaic art years ago and still appreciate this beautiful art form. Moroccan mosaic tilework is my favourite type of mosaic art because it reminds me of elaborate quilts. I've always wanted to replicate this art style in fabric and this year I finally did. The result is my newest pattern, Moroccan Tile Mini Quilt. This pattern may look a bit complicated but it really is simple, even for beginners. All straight cuts and no templates required! Go to my link to learn how to create a flange binding aka faux piping for the project.


Precious Bundle Baby Quilt now Charm Pack friendly!

One of the first quilt patterns I ever designed was the Precious Bundle baby quilt. That was five years ago. But, for whatever reason, I didn't design it for precuts. I'll chalk that up to inexperience.

For 2020, I redesigned this gorgeous baby quilt for charm packs. I'm hoping this will make it easier for even the most novice quilter. The only fabrics you will now need to make the Precious Bundle quilt top is one print charm pack, one solid white charm pack, and 1¼ yard white. How simple is that?! 


Precious Bundle Baby Quilt - Detail 2

Make Your Own Best Press Citrus Spray Starch

Make Your Own Best Press Citrus Spray Starch


Print Friendly and PDF

I love Mary Ellen's Best Press Spray. It helps my blocks press crisp and there's no starchy residue. The only downside is that it's way too expensive, especially here in Canada. Also, I don't like the smell of most of their scents; the lavender-scented spray smells like cheap men's cologne. I thought of using the scent-free Best Press, but it costs more than the scented. So, I decided to try making the homemade version of Best Press and I was pleased with the results.

I wanted my spray to have a nice scent but most of the recipes I found called for lavender essential oil and I didn't care for it. So, I tried the citrus essential oils (i.e. lemon, lemongrass, bergamot, orange, etc.) and loved the fresh citrusy scent. I use bergamot exclusively now. Bergamot is a fresh, uplifting Italian orange oil used for cosmetics and perfumes. Below is the recipe for the DIY Citrus Best Press that works just as well as the real deal. 


DIY CITRUS BEST PRESS (Makes 3 cups)

INGREDIENTS (Revised July 29, 2022)
  • 1½ cups distilled water (it must be distilled because some tap water minerals can stain your fabric).
  • 1½ cup vodka. Use only vodka because it is clear and odorless.
  • ¼ to ½ tsp. bergamot essential oil or any citrus essential oil.

Combine all ingredients. Store in a spray bottle. Shake well before each use.

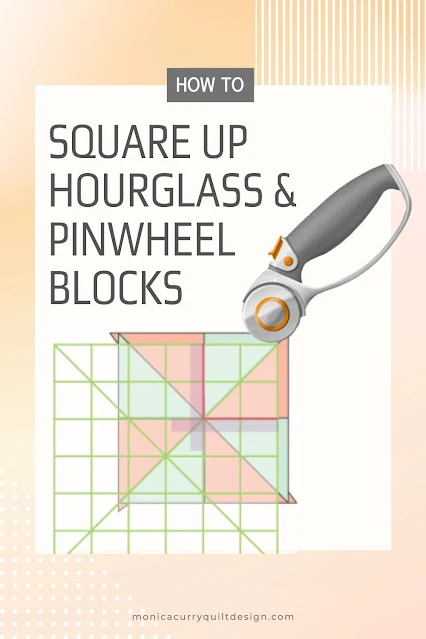
How to Square Up Hourglass & Pinwheel Blocks: No special ruler required!

This post is a supplementary tutorial for the Quick Block Calculator.

How to Square Up Hourglass & Pinwheel Blocks

When using the shortcut methods to make Hourglass and Pinwheel blocks, you often have to "square up" the block to the correct size you need. If these blocks are not squared up properly, you will end up with very wonky looking squares that will only be good for the scrap pile.

In this post, I'll show you a simple method for squaring up Hourglass, Pinwheel, and Half Square Triangle blocks that doesn't require a special ruler.

MATERIALS

INSTRUCTIONS

Hour Glass
  1. Divide the desired block size in half, e.g. 4½"÷ 2 = 2¼"
  2. Find this number on the ruler.
  3. Place a piece of tape horizontally and vertically on the ruler to mark the center of the block.
  4. Line up intersecting point of the tape with the center of the block.
  5. Line up the 45º angle with angle of the block.

6.  With a rotary cutter, cut off the exposed ends of the block.


7.  Turn the ruler and block 180º and, once again, line up the halfway point with the center of the block.


8.  With a rotary cutter, cut off the exposed ends of the block.


Pinwheel


Half Square Triangle

I'm published! Quilted Wall Hangings: 11 unique projects for quilt lovers

I've been published! 

Check out my modern quilt wall hanging, Coral Gem, published in the new Leisure Arts Publishing 

Coral Gem Wall Quilt by Monica Curry
"Coral Gem" Wall Quilt by Monica Curry


BUY HERE!

Book: Quilted Wall Hangings